Prototyping small circuits where it's not worth designing and etching a board can be done in many ways. I've used "ugly" (which I think is rather beautiful) where components float above the copper ground plane; MePads where small copper pads are superglued to the base plane; or strip board with track cuts.
Recently I've converged on a system that's working quite well for me.
The circuit is drawn out in pencil and the outline of the PCB rectangle is traced.
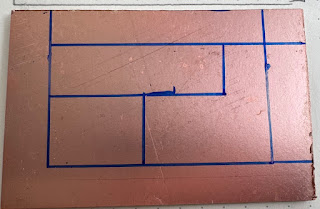
Working through what should not be connected to what, I draw the cut lines under a spaced out version of the circuit. Here's my drawing and below the final working board.
I mark up the board with the planned cuts.
To make the cuts in the copper, I lay the Dremel with a cutting wheel on the bench and lean it so that it just cuts the copper. I draw the board along the wheel, leaving the Dremel stationary. I can get pleasingly straight cuts this way. It is worth checking for non-conduction between areas with a multi-meter as sometimes a strand of copper can be left at a corner.
To hold components against the board for soldering you need some sort of "helping hands" but the one I learned about from an Adam Savage video is called Omnifixo. They are not cheap but are well worth it for all the cleverness.
For years I've been using a little, rather low power, bench soldering iron but I find that quite a lot of power is needed when soldering to large copper areas. I have switched to a 70W iron and it is a revelation.
Naturally, I first had the transistor in the wrong way around, but after that was fixed. The joy of oscillation was experienced.
I'm sure this is not news to any readers but I thought it worth documenting for some who might be getting started with home construction. It's not as compact as other techniques but lends itself to making changes.
One other thing I do these days is add an LED (and resistor) to the power line. It looks nice and I can't tell you how much time I've wasted wondering why an un-powered circuit doesn't work!


No comments:
Post a Comment