My sister Jane once asked for a horse because "everyone in her class has a horse".
Sometimes it feels that way with 3D printers. Several people have recommended the Creality Ender-3 printer as a good starter model. I ordered the Ender-3 v2 and paid AU$360. (Excellent value).
What arrived was a well packed kit. The base is already put together but you need to do the rest.
They do supply everything including tools such as hex keys, screwdriver, spanners and even side-cutters (which are used to cut filament). I was a bit daunted by the process but took my time and it came together.
STL files can be loaded from a micro-SD card. They supply a card but my printer wouldn't read it for some reason. I formatted another card FAT32 and that worked fine. I was unsure that I'd got the base level enough but my first print, the Chinese cat you see below came out impressively well:
As you can see from my early prints here, my first use for a 3D printer is to make tuning knobs for radios. (Oh, and toys for the grandson).
There are many pre-made models ready to slice and print at Thingaverse, Thangs, Printables and others but I want to be able to design my own.
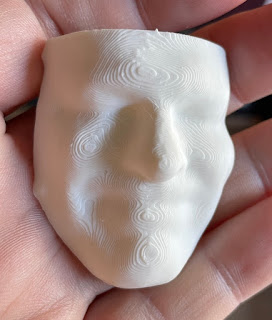
I scanned my face with the iOS app "3d Scanner App", exported to STL, imported in to Blender to tidy up and printed it:


My impression is that while you can make Blender work, it's a bit of a round peg in a square hole. I've had a lot of success with Tinkercad which is web-based and good enough for pretty simple stuff.
ReplyDeleteFor the more technically-minded, OpenSCAD is quite good. You define the shapes in a text-based programming language. Means you can actually perform maths operations on it. I've designed a couple of successful things in that.
And the gold standard is tools like Fusion360. There's a free license for hobbyists but a very steep learning curve. I'm at the bottom of that curve right now but it's clearly the exact right tool for the job.
You've come a long way quickly Peter. Seems like a good home printer for hobbies and repairing a broken door handle or two. Paul VK3HN.
ReplyDelete